First Things
Unpack the appliance. Inside the box, you should find the quick-start guide, AC power cord, and rack-mount accessories. If you have purchased support with your appliance, you will also find a USB stick: do not format or erase this USB drive, as it has a bootable image that can be used for re-installation of the product.
If you are not familiar with the equipment, we highly recommend that you begin by testing with a small, non-production network, before placing the appliance in a production environment.
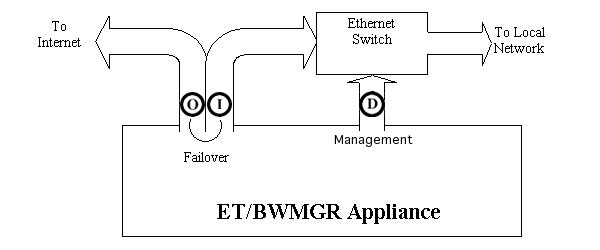
Making the Connections
(A) = AC Power In
(K) = Keyboard
(U) = USB Ports
(V) = VGA Monitor
(D) = Administrative Ethernet
(E) = Unused Ethernet
(O) = Outside Failover Port
(I) = Inside Failover Port
| Network Port | Appliance Type | |||
|---|---|---|---|---|
| ET/R2400[H/L] | ET/R2800 | ET/R2800D | ET/A1600 | |
| (D) / Administrative Ethernet | igb0 | igb0 | igb0 | em0 |
| (E) / Unused | emx0 | igb1 | igb1 | em1 |
| (O) / Outside Failover Port | em0 | igb3* | igb2 | em2 |
| (I) / Inside Failover Port | em1 | igb4* | igb3 | em3 |
*This may be em0/em1 if purchased with a dual or quad core CPU
- Connect (O) to your WAN or upstream switch, using the appropriate cable. This is your "outside" interface, and it will be the default interface where you will add your rules.
- Connect (I) to your test host or internal switch, using the appropriate cable.
- Ensure that traffic passes between the devices on (O) and (I) with the unit powered off. This tests the "bypass" condition. In this condition the (O) and (I) ports act as a passive coupler.
Once you have tested the bypass connection, it's time to power-on.
- Connect your keyboard (K) and VGA monitor (V).
- Connect (D) to your internal switch. This port will be used for the system administration and operation of the ET/BWMGR.
- Connect (A) to your AC mains power. The auto-switching power supply can accept 120/240VAC.
Booting for the First Time
The unit will take a minute or so to boot. Once the boot is complete you'll see the normal unix login on the console.
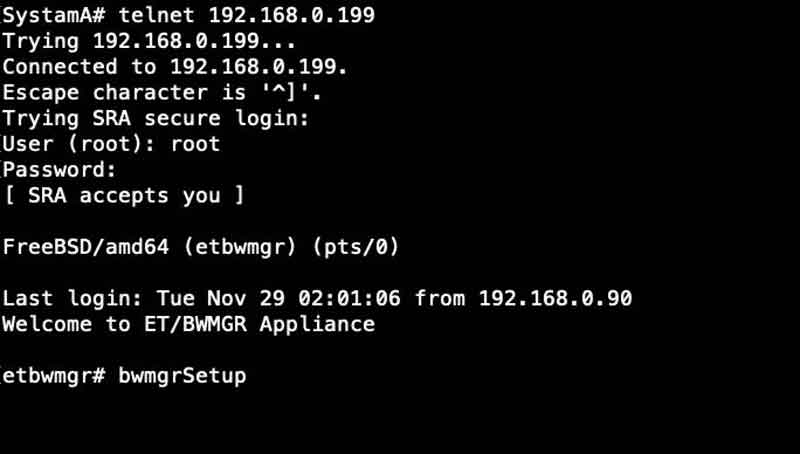
You can set up the unit on the console or remotely using telnet or ssh. To access the system remotely, telnet or ssh into 192.168.0.199. You'll need to set up your terminal device to be able to access that address. Once you connect you should see the same login as on the console. Once you get the login prompt, log in with user admin and password saturn5. Once in, you'll get a prompt. Type in su - to get into superuser.
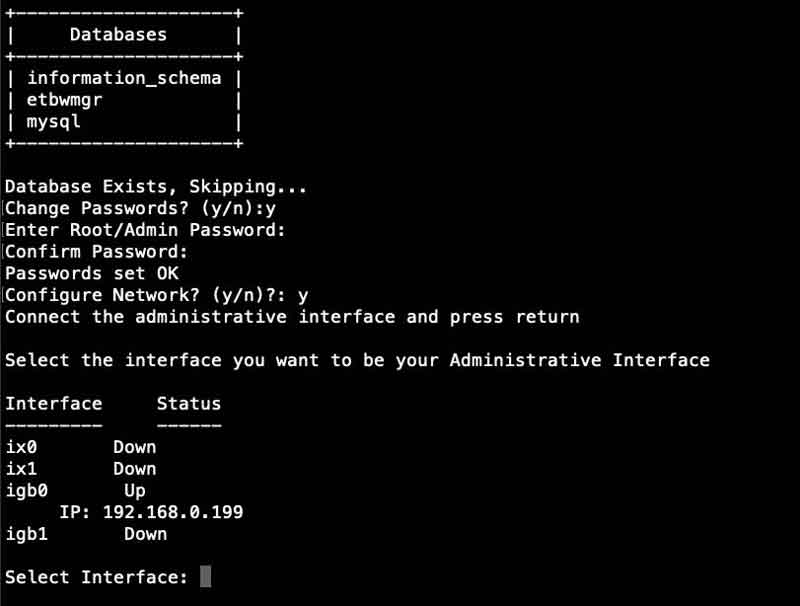
You'll be prompted to enter a new password and to enter some network questions. You should plug the administration ethernet port (on the Motherboard) before running the utility. You should also open up the bypass card and be prepared to plug in one of the ports when prompted. You can open the bypass with
# bypass open
You'll need to run bwmgrSetup to configure your password and network:
The utility will allow you to set up your network and configure bridging.
If you have purchased an appliance, your bridge should be set up already, so you will see this message:
Bridge already set up, skipping.
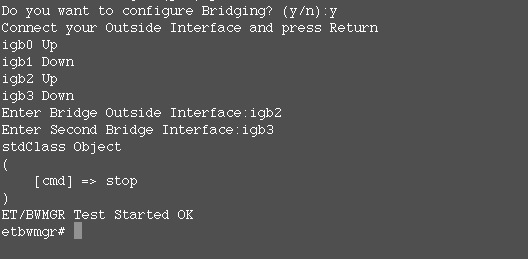
Setting up Bridging
If there is no bridge configured, you will be prompted to set one up. You'll also be setting up your outside interface; this is the ethernet port on your bypass card that is connected to the internet router.
Once you've completed the utility, your local networking and bridge has been set up. If you have more than 1 bridge, you'll need to refer to the v5 User Manual to set those up manually.
The script will restart the software; if you've purchases a system with a license it should be running with your license. If not, it will be running in test mode. Note that address you gave the system will be set up as an alias until you reboot. You should reboot the system to test that the address and the bridge come up properly before putting the system into production.
# reboot
Logging in
After rebooting, the 192.168.0.199 address will no longer work; you should log in remotely using the IP address you entered. To log in from a terminal, you can log in as "admin", and then su to super user. You'll enter the password you selected when you first booted for both prompts below.
# telnet -l admin IP_ADDRESS

user: admin

password: *******
At the prompt, type "su -".
> su -

password: ******

#
You're now logged into the system console.
Enable the Bypass Card
If you have a bypass card, you need to enable the bypassd service in the Admin->Services screen.
Accessing the GUI (Graphical User Interface)
The GUI runs as the default web page on the system, so to access it you'll need to use a browser. We recommend either Safari or Chrome. We develop in Safari, so we highly recommend that you use that.
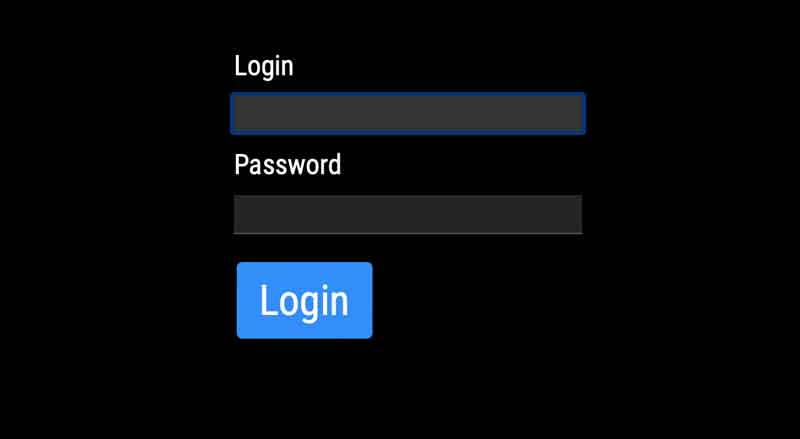
Just enter the address of the Demo Appliance and you should get a login page.
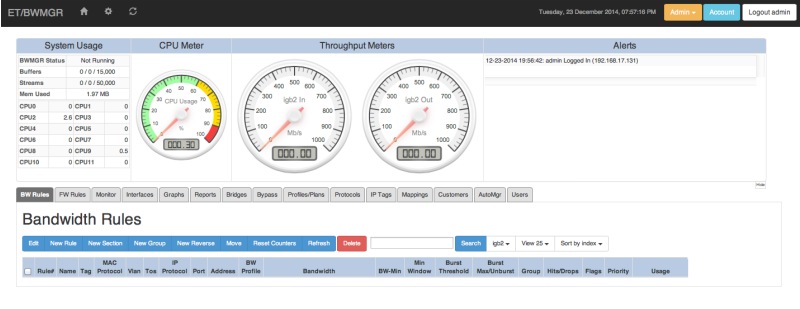
Enter admin as the user and your password, and it should bring you to the main screen.
Make a Recovery USB
One you have your system step and, you should make a recovery USB. You'll be able to boot from this or recover files in the event of a crash. You'll need an 8GB or larger USB.
1) Insert the USB into a USB slot in your system
2) Check to conform the USB is detected:
diskutil list
You should see da0 for the USB.
3) Run the backup utility
diskutil da0 backup
If you have a dual disk system and plan to keep a backup, you can skip this step, but a recovery usb will also allow you to reinstall, so it's handy to have just in case.
Next Steps
The basic set-up of your Bandwidth Management Appliance is done. Now it's time to continue to the Appliance Manual.


